I have been so determined to make everything for the wedding, and also make it all really detailed and personalized! I see so many cute things on Instagram and Pinterest, and always go, “can I make that with my Cricut?”
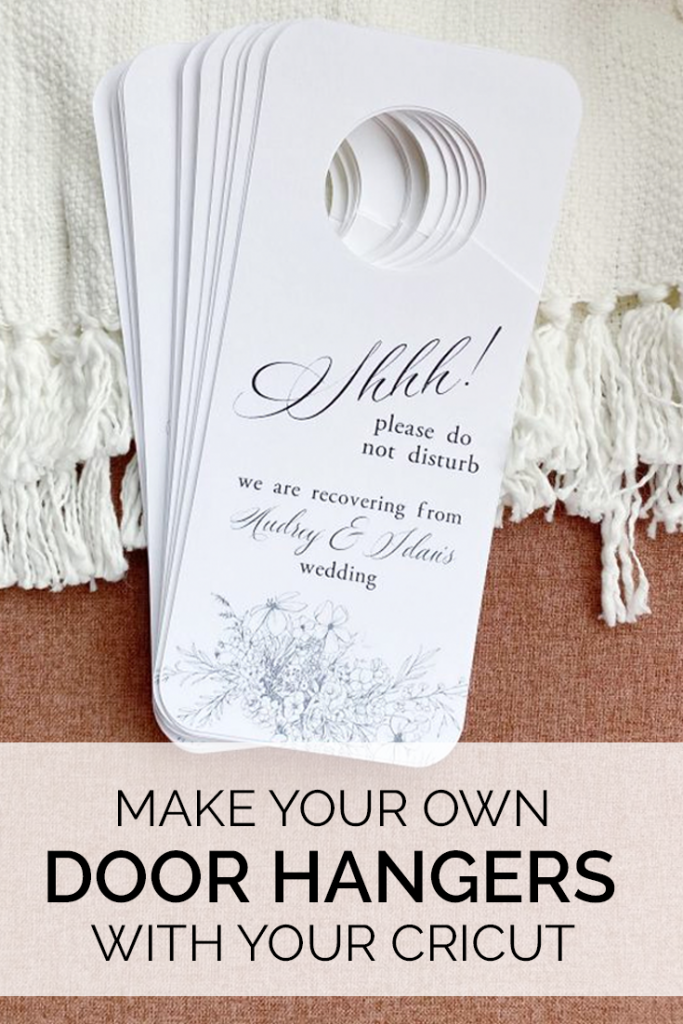
When I started seeing door tags pop up, I knew there had to be a way to make this happen with my Cricut. And so I did!
Note: If you’re brand new to the Cricut world, I suggest reading this post first!
How to Make a Door Hanger with your Cricut:
Open Cricut Design Space and start a new blank page.
Find an image online for a door hanger that you like! I like this one and this one. Save to your computer and import to Design Space, removing the white background as necessary.
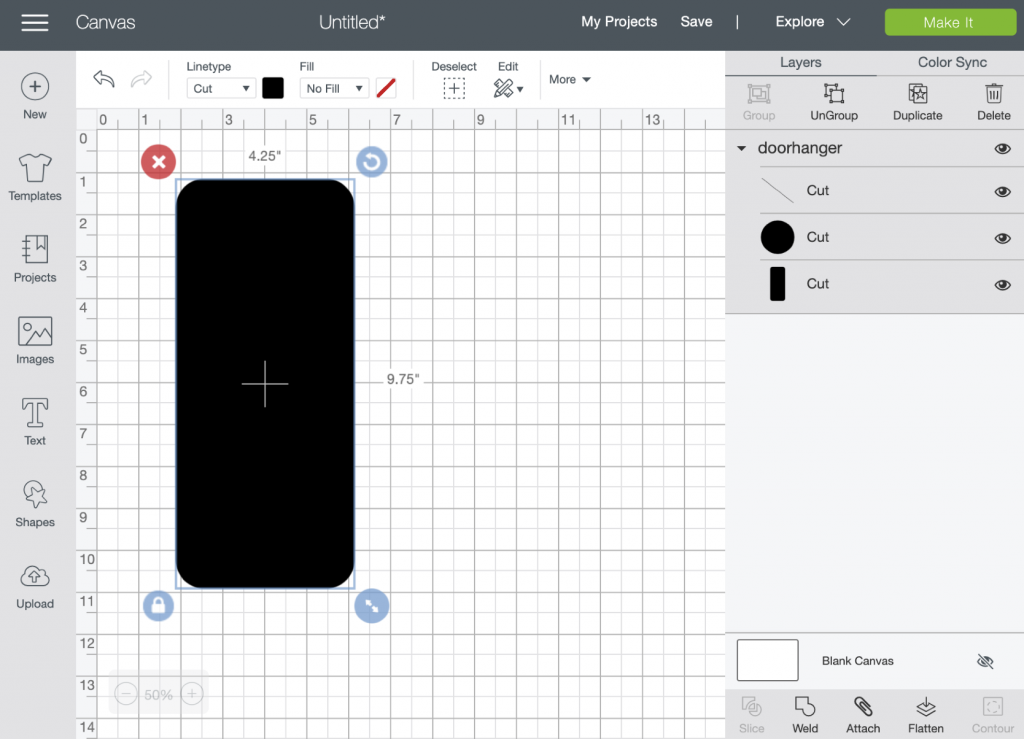
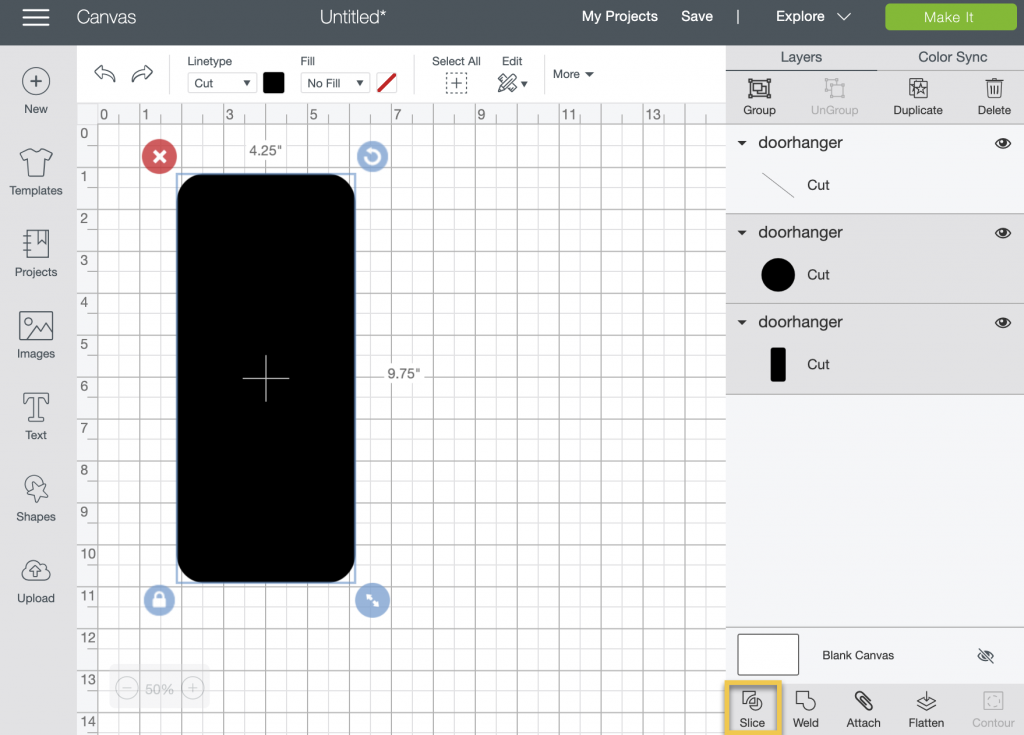
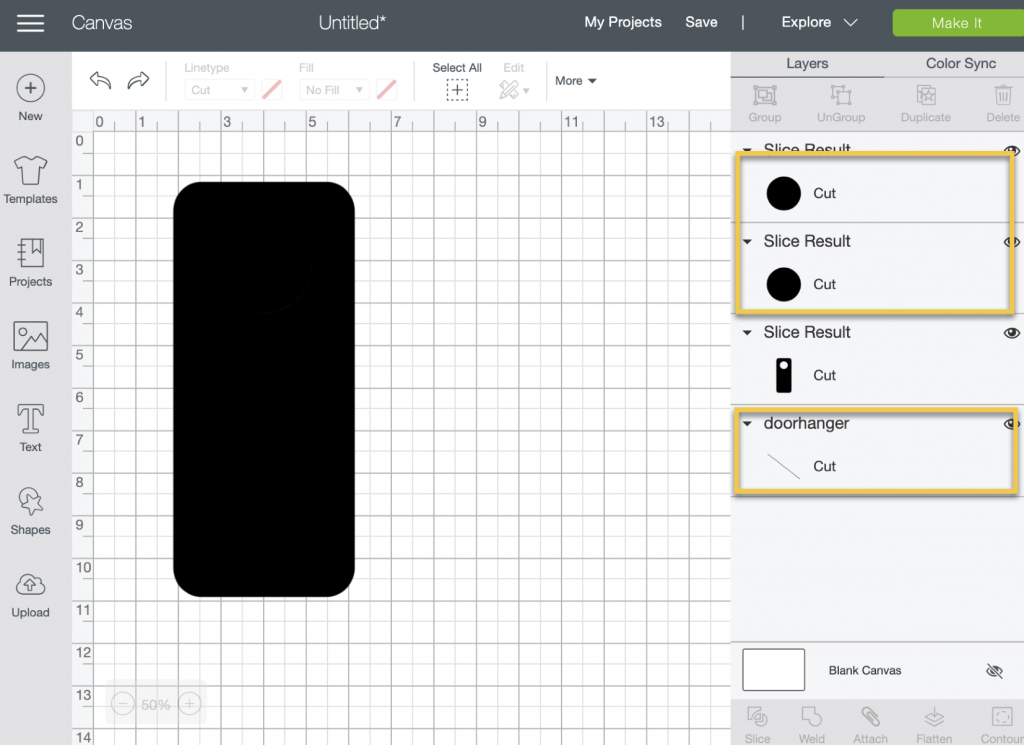
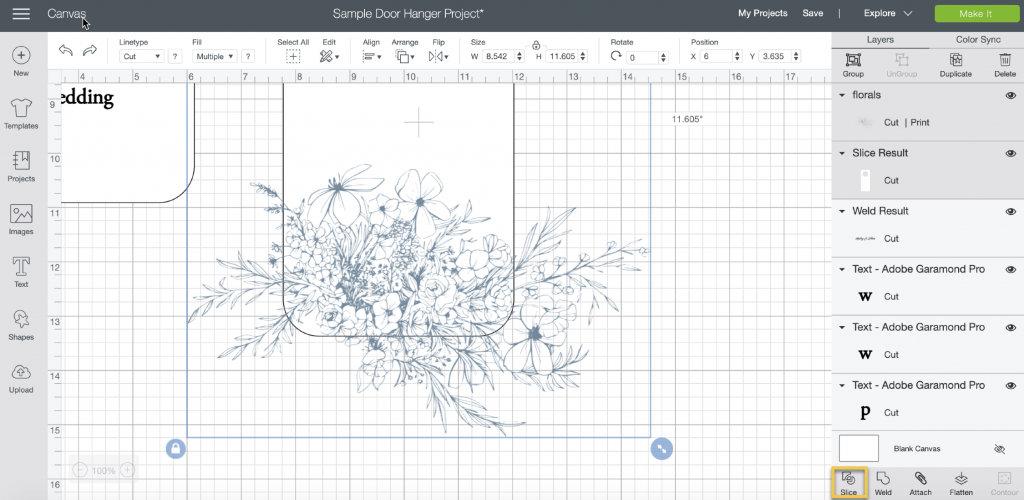
Then, use the slice tool to remove the circle from the inside of the rectangle, and delete the leftovers until you have the shape of a door hanger. In this case, it’s the 3 elements highlighted below:
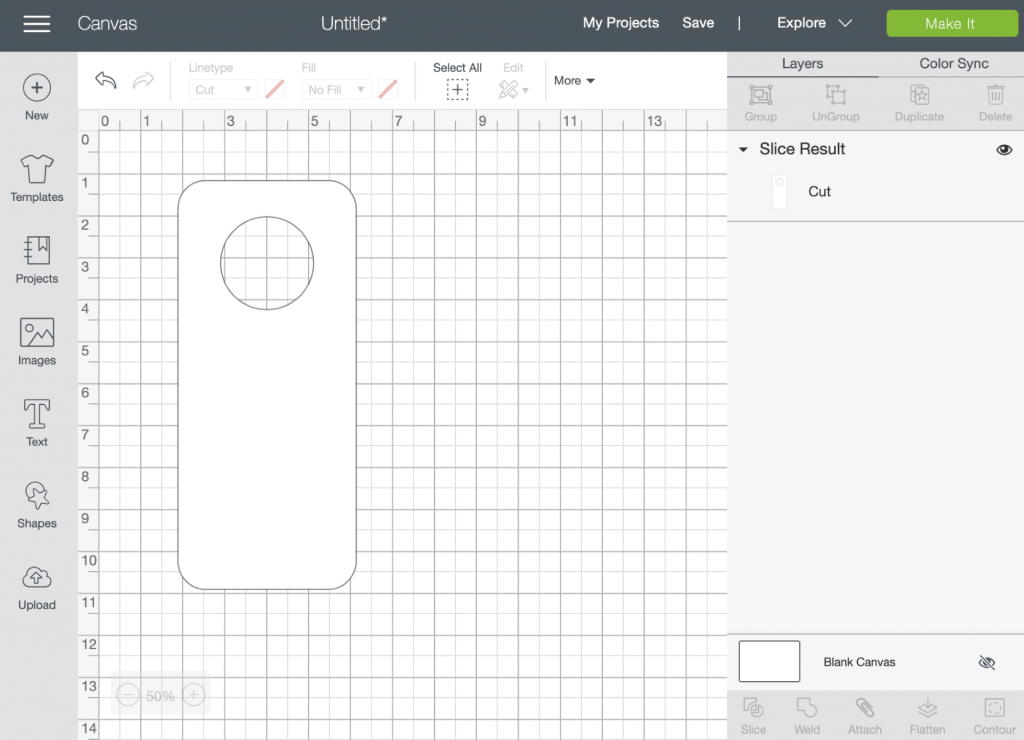
Then, turn your door hanger white so you can see what you’re putting on it!
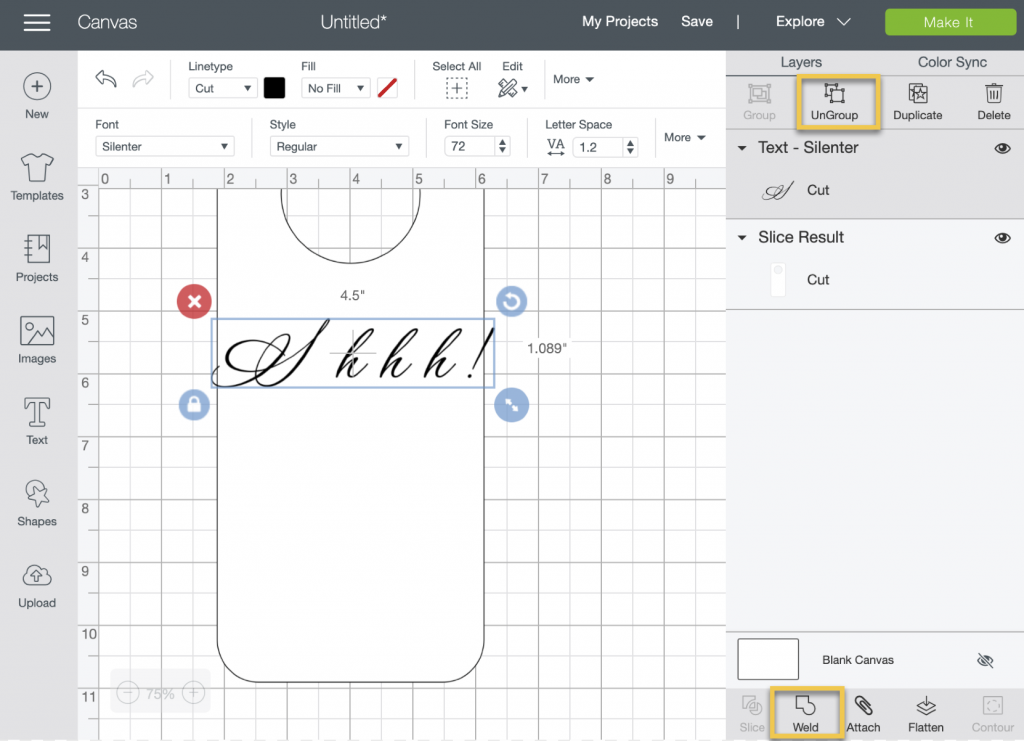
Add in your desired text. For the “Shhh!,” I ungrouped the letters and then used the merge tool to re-merge them once they were arranged to my liking.
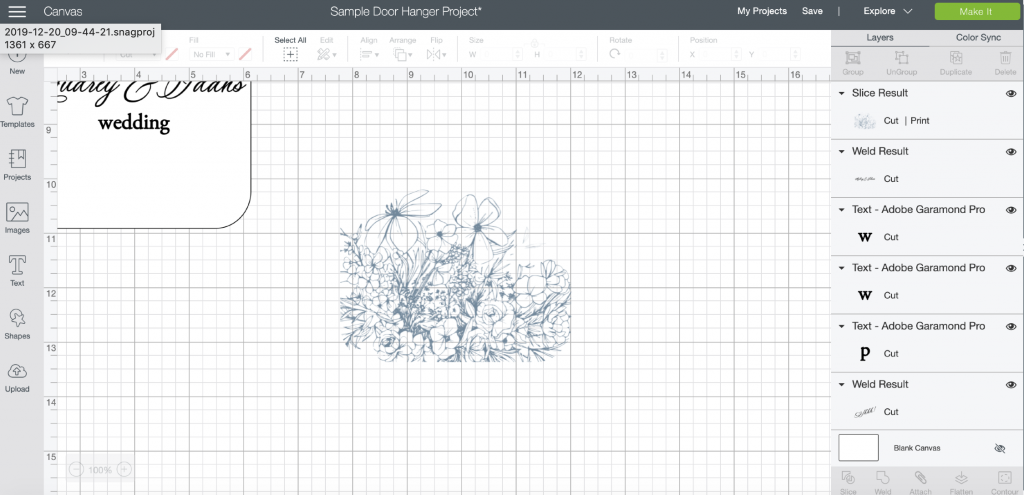
For the florals, I made a copy of the white door hanger, then layered the floral pattern on top. Then, I selected both layers and used the slice tool to slice the shape out of the flowers.
This left a few too many layers, so I deleted all except the one I needed (highlighted below):

Then, I moved the cut-out floral pattern to my main door hanger design!
From there, I selected all layers and clicked “flatten.” This made it so the machine knows to print then cut.
Note: I have a black and white printer, but if I had a color one, I would have made sure all the text was in the same color as the floral design.
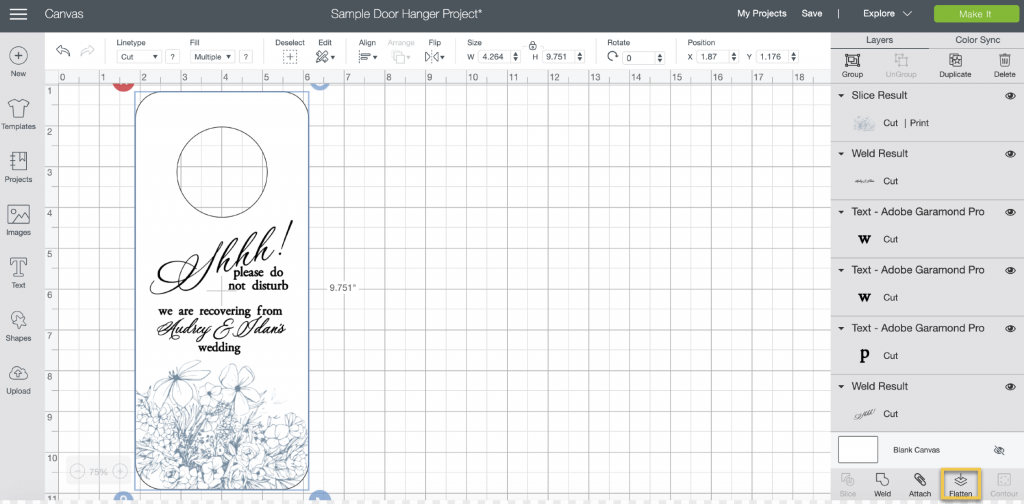
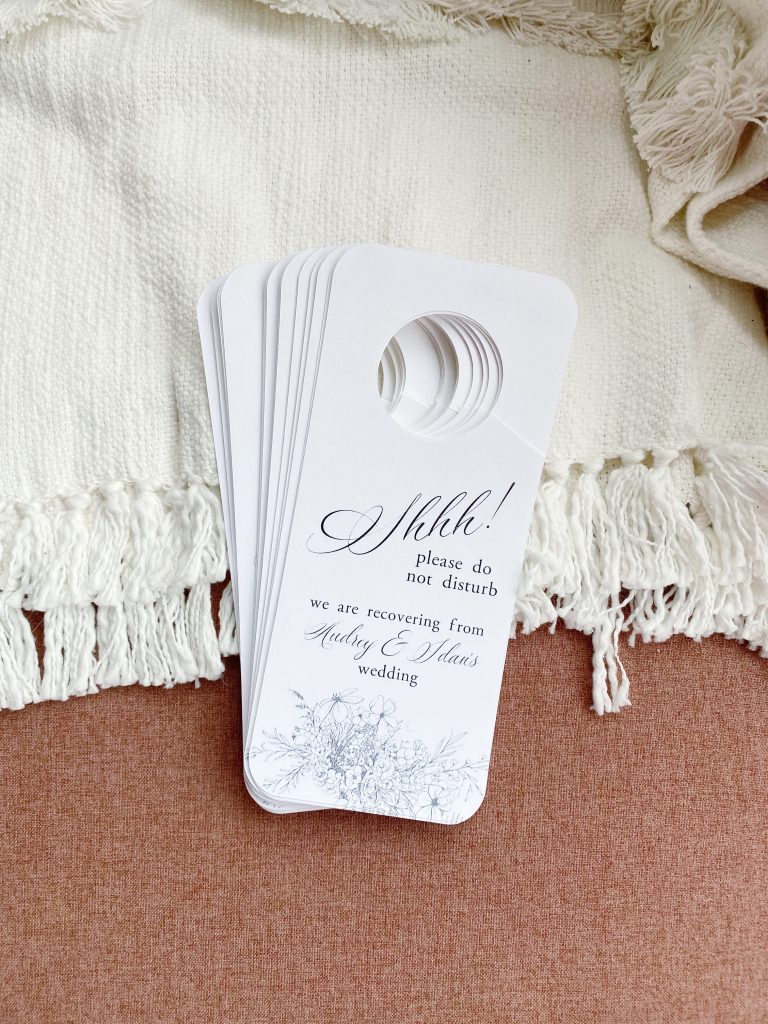
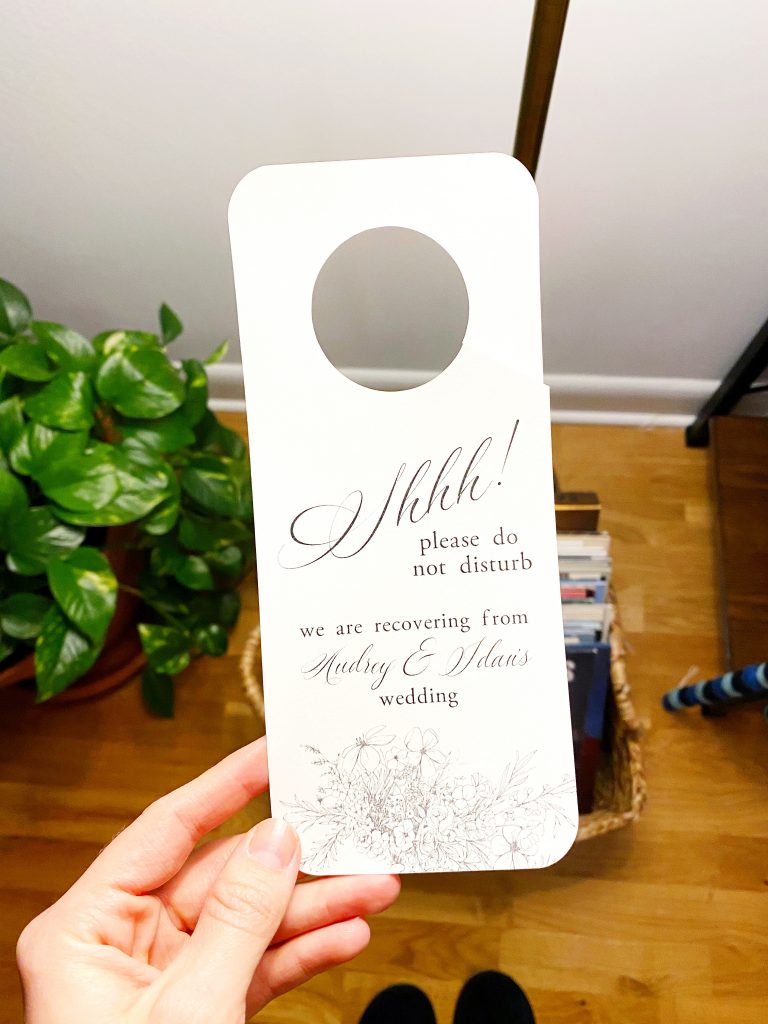
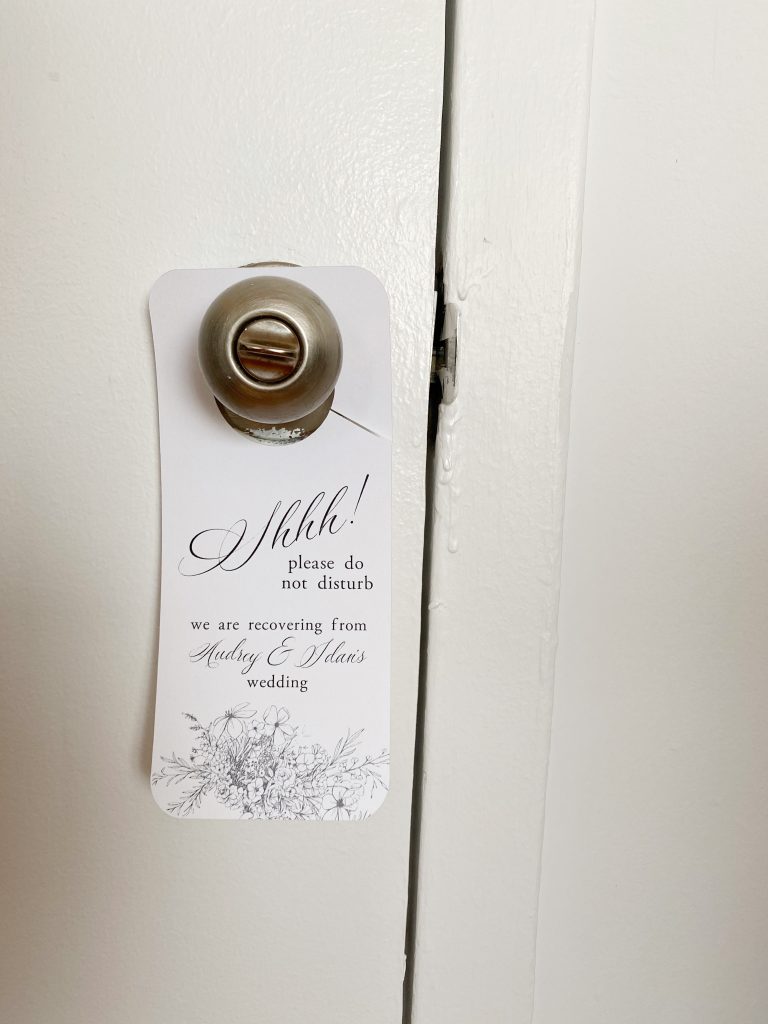
The (digitally) finished product! Now on to printing and cutting…

When you click “make it!” the system will prompt you to print copies of the project. The cutting lines won’t show up on the print out, but don’t worry–that comes later.
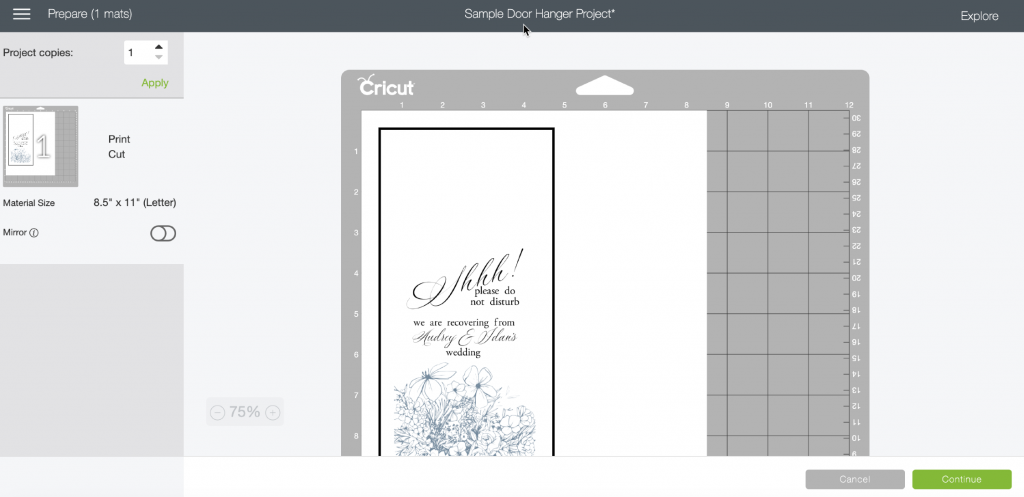
Print as many copies as you need–I suggest doing a test round, but I ended up doing 30 or so in total once I was sure I had it right!
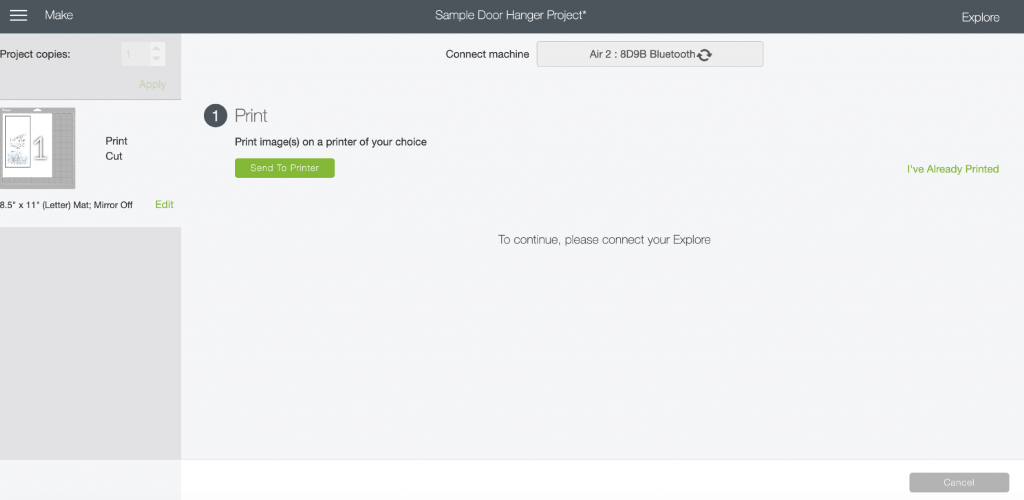
Once they’re printed, you’ll feed them back into the Cricut machine and it will cut from there. Just make sure you align the page with the top left corner of the cutting mat as closely as you can! The black lines around the print out are just so the Cricut machine can tell where it needs to cut exactly. The machine will use a light to scan the lines, which takes a minute!
That’s it! It’s a bit painstaking to make a bunch, but once you get into a groove it’s really easy. Enjoy!
//
If you liked this post, you’ll like:
Cricut Beginner’s Guide
DIY Valentine’s Day Mugs
Friends Themed Tea Towels
Pin for later: