
As I’m sure you’ve seen on the blog before, I’m kind of obsessed with my home space. It has to look as perfect as possible, and my roommate and I always joke that our apartment can never be more than 10 minutes away from “guest ready”… aka we can throw a party or have people come to stay with us with just 10 minutes of cleaning. Call us crazy, but hey, if you ever wanted to come over, all you’d need to give us is a 10-minute warning and I call that pretty good.
Coming back from THAT tangent… over the summer Tori and I redid our kitchen–we painted the kitchen cabinets black, added silver hardware, and covered the awful laminate with some pretty marble contact paper. And months later, it’s all still holding up–I have to admit, the contact paper still being intact after 6 months surprised me, too.

Because I am completely restless, I decided that I needed a subway tile backsplash, too (something I’ve wanted for a while). While hiring a contractor or installing a real tile backsplash in a place I don’t own was completely out of the question, I was definitely open to the idea of a more temporary, cheaper option.

Enter Smart Tiles.
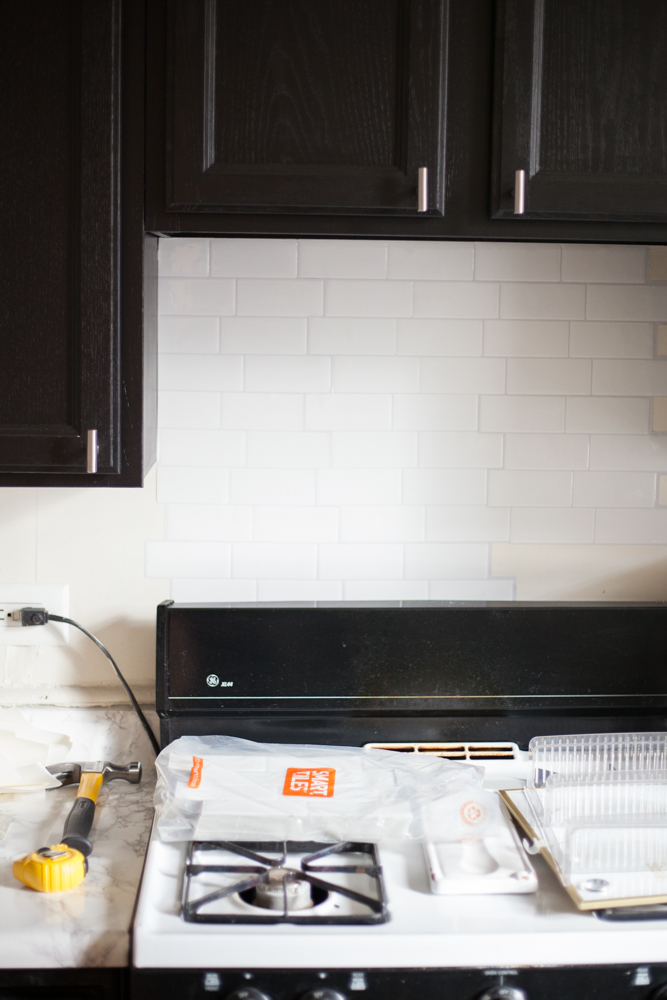
I first read about these tiles on my friend Krys’ blog a few years ago–she is an expert in rental renovations and totally sold these tiles to me. Smart Tiles are basically giant stickers. They are flexible and easy to cut with a box cutter or x-acto knife. And they are super easy to install!

How to install this stick-on tile backsplash:
First I figured out how many tiles I would need. Smart Tiles has an excellent calculator on their website to help you figure this out! I measured the space in sections–so section A, section B, section C, etc. You can measure in feet, OR measure in inches and divide by 12 (that’s what I did… not sure if that made more work for myself or not but whatever!).
My final measurements:
Section A: 23″ x 17″
Section B: 54″ x 17″
Section C: 30″ x 30″
Section D: 11″ x 17″
I ended up needing about 35 tiles according to their website, and this could not have been more accurate. Wahoo!

I received the tiles very quickly and got to work that weekend. I started out on the top left corner of the largest section, cutting the first tile down to a straight edge so it lined up perfectly with the wall. From there, everything was pretty easy.

I filled up the entire backsplash with tiles, minus the edges where I knew I’d have to do some cutting. Then after a lot of x-acto knife and ruler use, I filled in the edges!
When I inevitably made a few mistakes, the tiles were surprisingly easy to peel off and move around. They are designed to be delicately stuck to the wall so they may be removed easily if necessary. When I was ready for the tiles to be in their final place, I just applied pressure to all corners and edges of the tile to stick them permanently on the wall! Easy peasy.
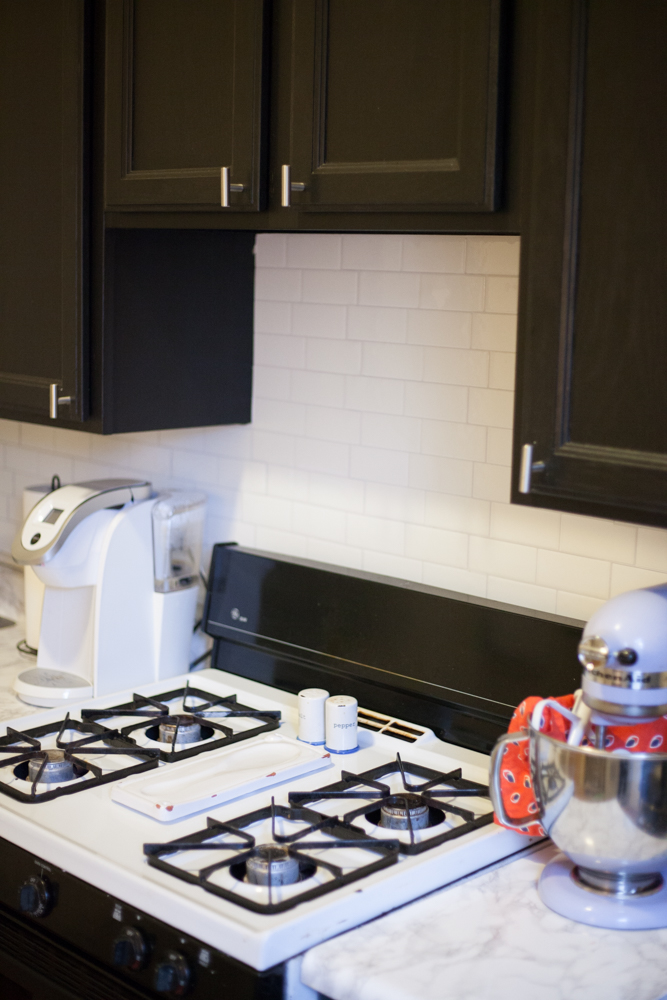
The whole project took about 2 hours and I could not be happier with the result! The kitchen looks even more sophisticated than it did when we painted it (especially now that I have my new KitchenAid mixer!!).

I should note that Smart Tiles are easy to remove with a hair dryer (for heat). Not that you’ll ever want to take them down!
My favorite styles:

If you have any other questions about Smart Tiles, check out their FAQ page or comment below! Smart Tiles are available at Amazon, Wayfair, Home Depot, and directly from their website.

Smart Tiles provided me with the tiles to review, and all opinions of my new stick-on tile backsplash are strictly my own. Thank you for supporting brands that keep Love Always, Audrey running!
P.S. If you liked this post you’ll like this one, this one, and this one.
Pin it for later: