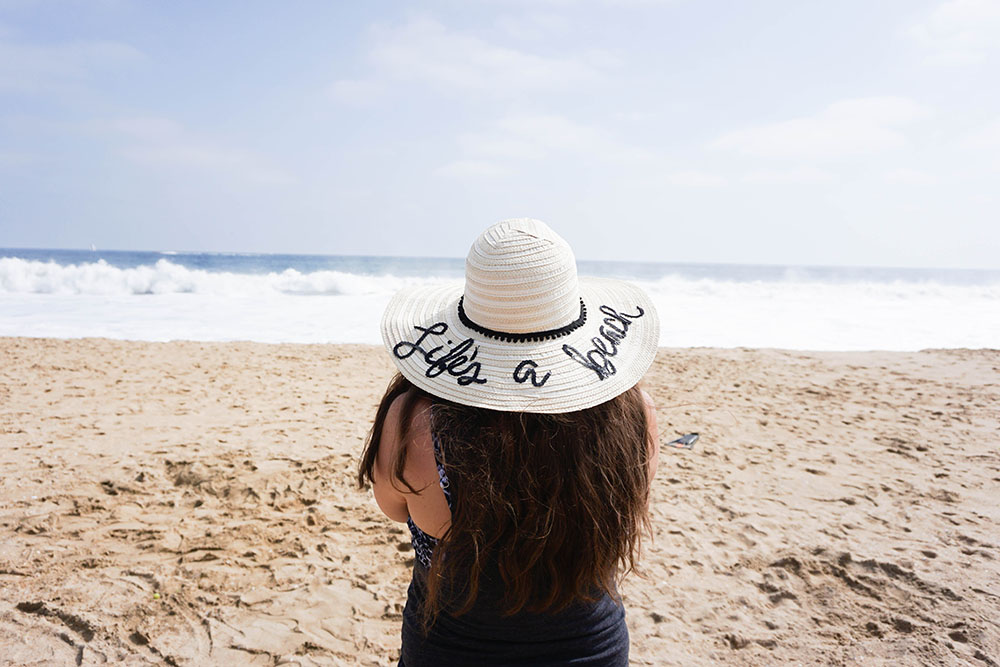
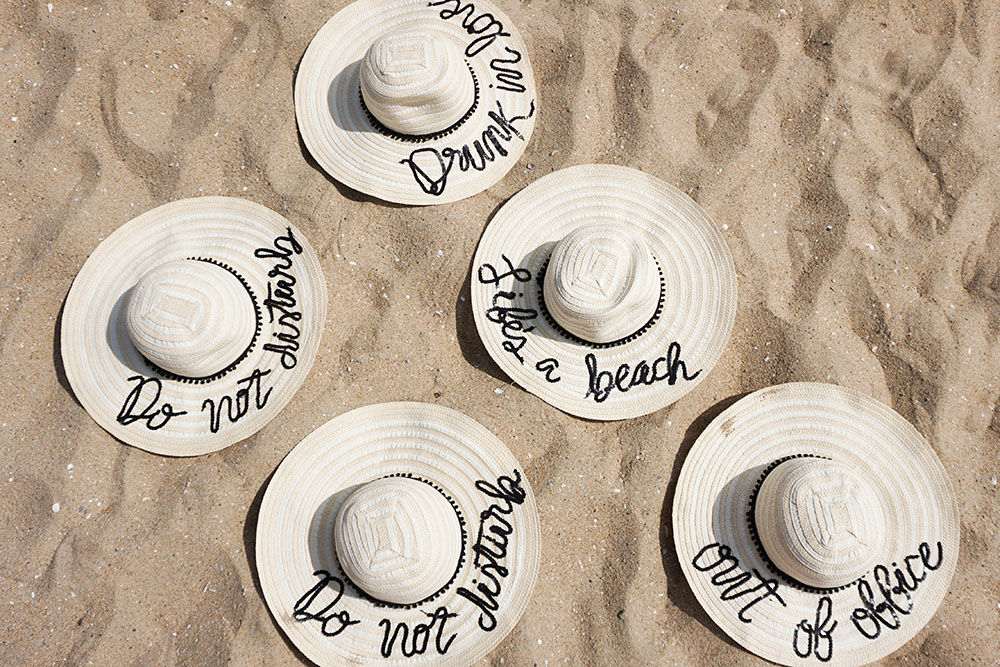
If you saw my Beach Bachelorette Party post, you saw the hats I DIY’ed for the event. These hats were a huge hit amongst the guests, and apparently, my readers as well (thanks for compliments, guys!).
I didn’t want to hoard all the fun for myself, so here’s a tutorial on how to make a floppy hat of your own! I even included some templates, just in case. Enjoy!
P.S. If you make one, be sure to tag me in your Instagram photos (@audreyhirschl). I can’t wait to see what you create!
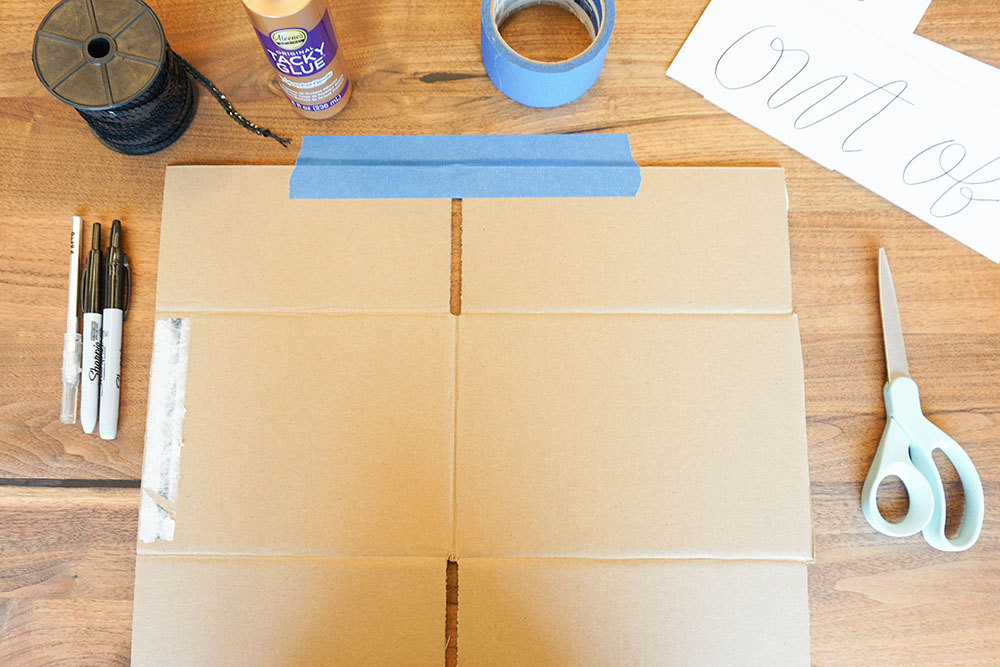
Supplies:
– Plain floppy hat
– Tacky glue
– Sequin trim
– Pom pom trim
– ScotchBlue painter’s tape
– A piece of cardboard
– X-acto knife
– Scissors
– Ultra fine permanent marker
– Cardstock (or another type of thick paper)
Step One:
Download one (or all!) of the templates listed below:
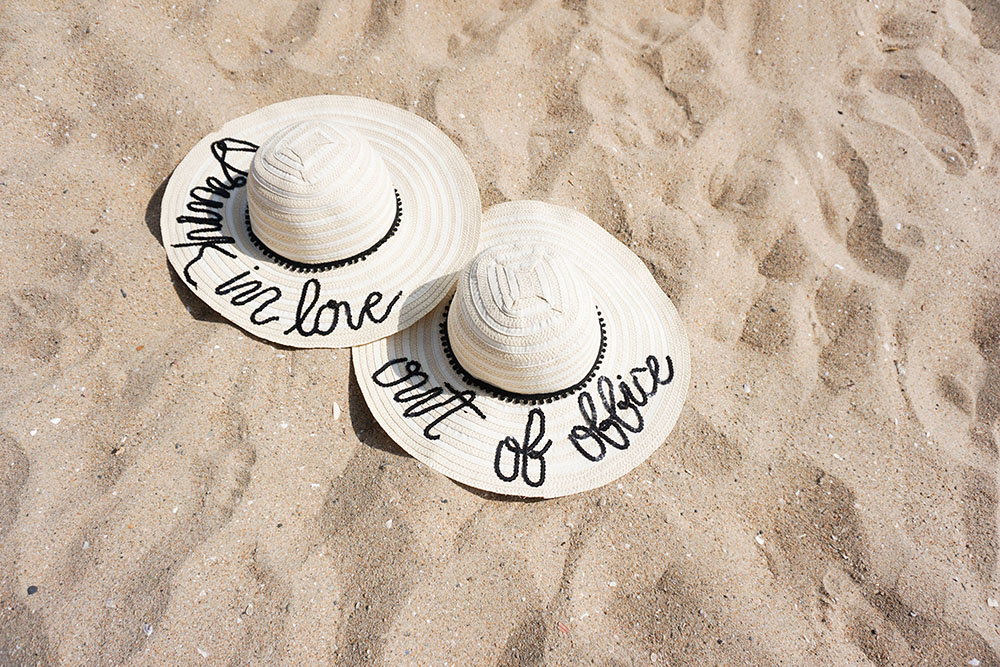
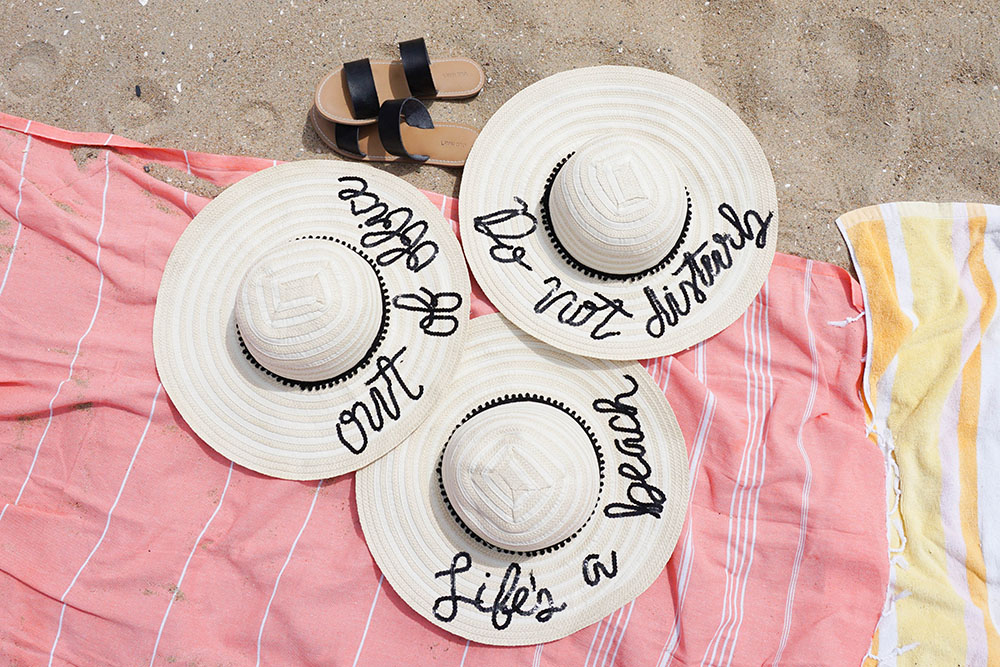
Out Of Office
Do Not Disturb
Life’s A Beach
Fun In The Sun
Drunk In Love
Print out the template on cardstock, or another thick-er paper.
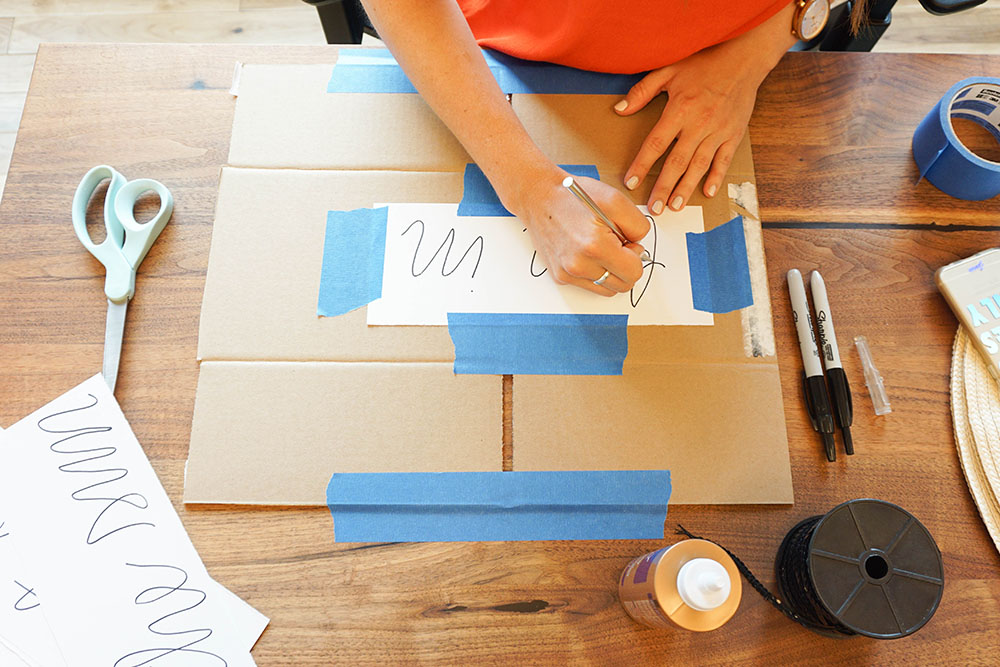
Step Two:
Cut along the letter lines with an X-Acto knife. Be sure to cut all the way through the paper! This will ensure that you can get through the paper with the Sharpie later on.
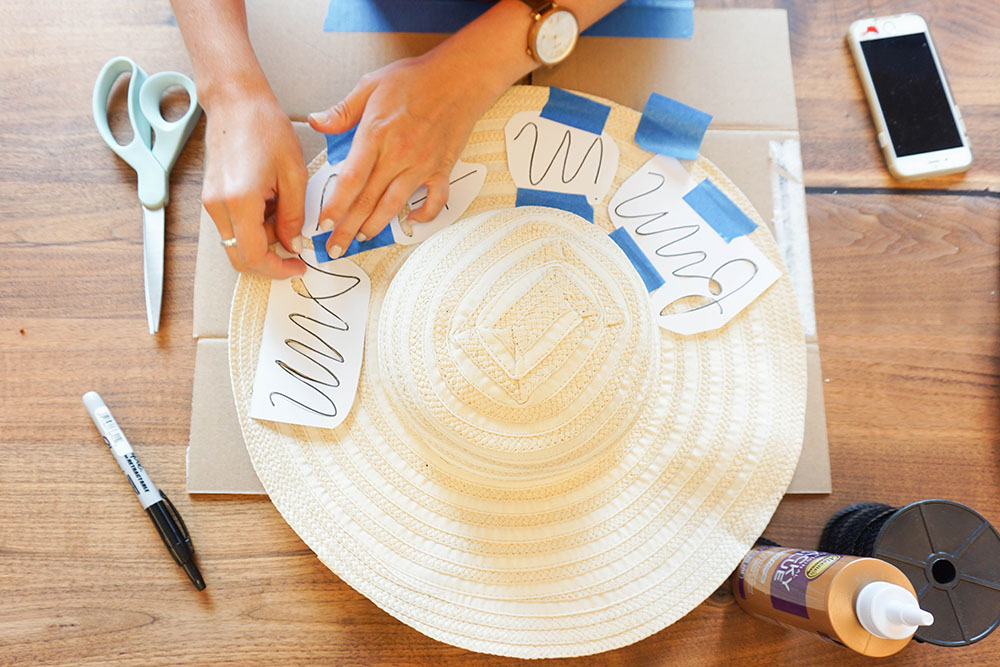
Step Three:
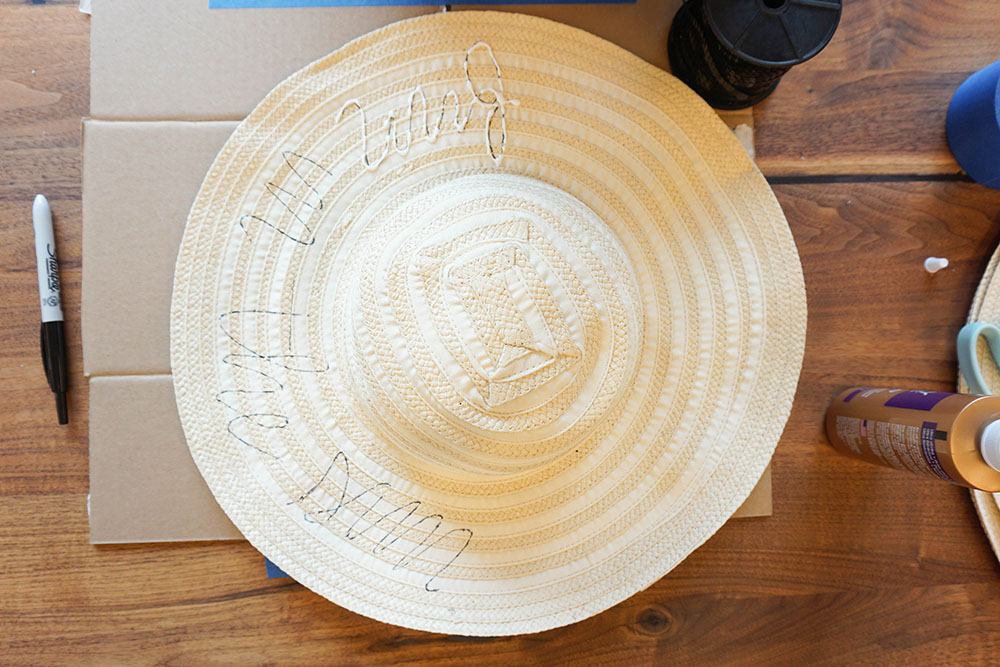
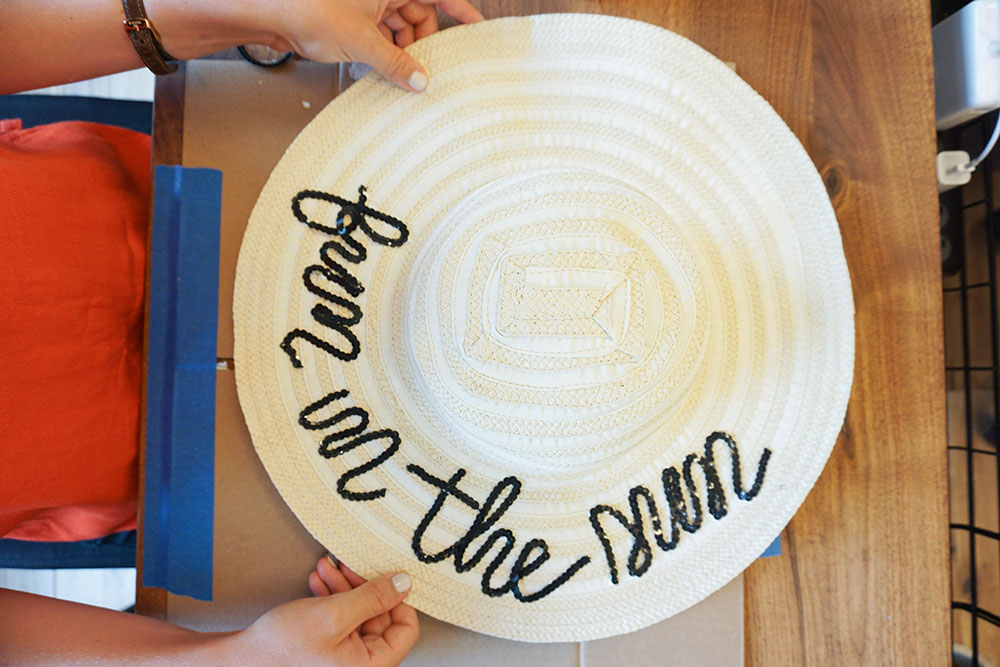
Use the Blue Painter’s Tape to hold the words in place on the hat. Be sure this is where you want the words to go–no going back now!


Step Four:
Carefully trace through the cuts in the paper, along the letters.
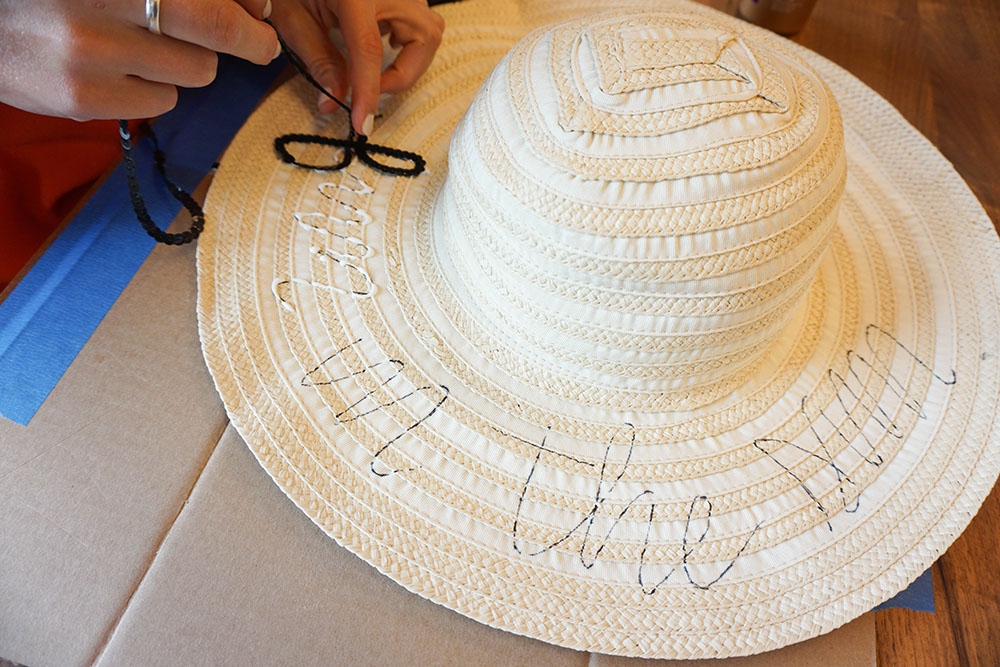
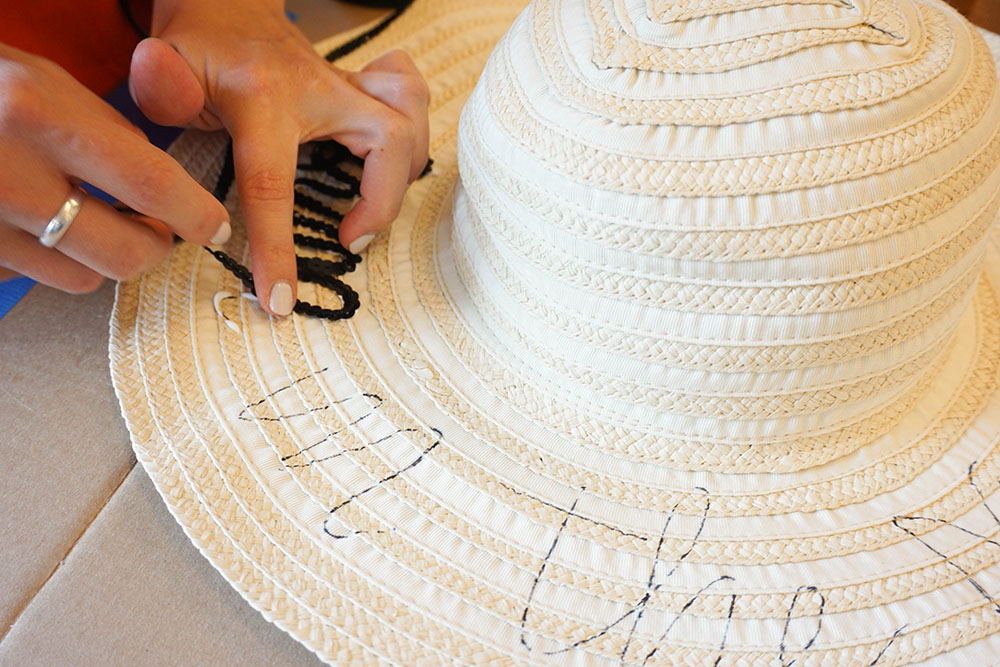
Step Five:
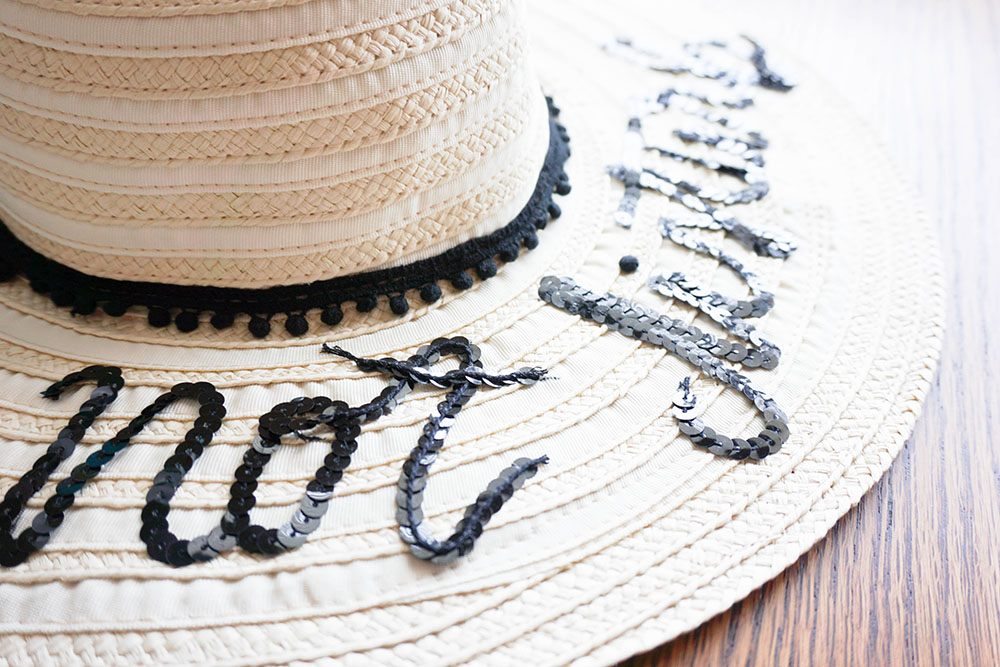
Trace your letters with glue, one word at a time. Carefully put down the sequin trim in one piece, and cut the trim where you need to.
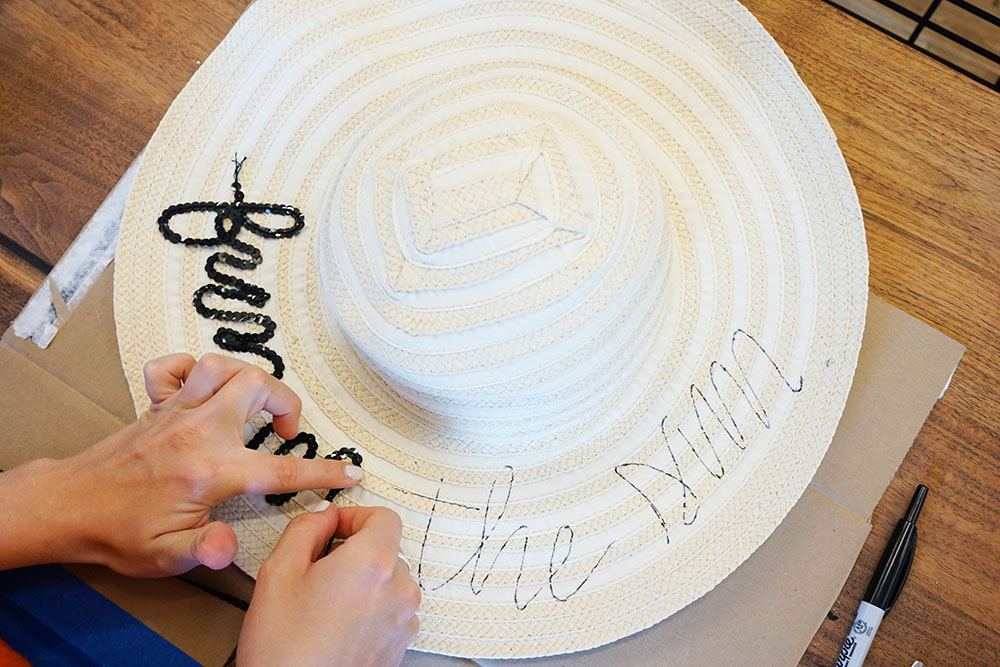
Step Six:
Dot your I’s and cross your t’s! Also, use the same glue to place the pom pom trim around the brim of the hat if you please.
Step Seven:
Wait for everything to dry, put some sunscreen on, and enjoy the sunshine! Happy summer!